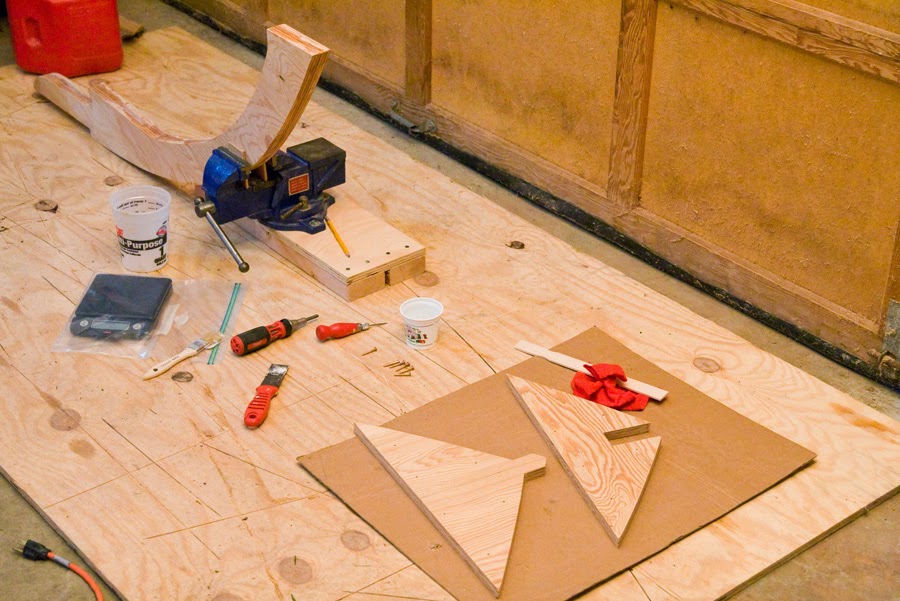
In the past, I would assemble the two pieces of the breasthook and let the epoxy cure. Then, later on, I would attach the completed breasthook to the stem. This time, I assembled all three pieces together at the same time, using only one batch of epoxy.
The reason for doing it this way was to avoid having to deal with the bead of hardened epoxy that forms along seams where the epoxy is squeezed out from between two parts. I’ve learned that it’s a good idea to scrape away any squeezed-out epoxy before it cures by using a small, flexible putty knife. Still, if a bead of hardened epoxy forms on an inside corner, (such as in the notch of the breasthook), it can be difficult to remove. It can also cause problems when you’re fitting pieces together.
By putting all three pieces together at the same time, this problem is easily avoided.
I decided to assemble the breasthook and stem with the same batch of SilverTip epoxy that I was using to encapsulate limbers and underside parts on the Utility. Not much epoxy was required for this small bit of encapsulation. I had a small amount of #2 silica ready to add to the remaining epoxy when I was done. The Zip parts were disassembled and staged, ready and waiting for the epoxy.
 |
| Limbers & underside parts of the Utility needed to be encapsulated before I attach the bottom planking. I wont be able to reach these places once the planking is on. |
 |
| All the Zip parts set to go: stem, mixing cup for epoxy, kitchen scale in a freezer bag, chip brush, screwdriver, putty knife, awl, small container for #2 silica, mixing stick, rag, and both parts of the breasthook. |
 |
| The Zips stem |
 |
| Stem and breasthook assembled, waiting for the epoxy to cure. These parts are all made from 3/4" marine-grade Douglas Fir plywood. |
0 komentar:
Posting Komentar