Tampilkan postingan dengan label one. Tampilkan semua postingan

And the painting continues

After the fourth coat of Whidbey White, the dark colors of the wood arent showing through. So, the middle section is basically done... except for the sheers, which will be painted Sea Foam Green.

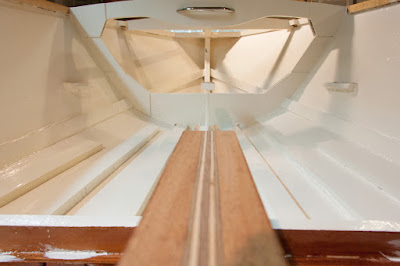

With this section finished, I re-installed the stainless steel grab handle onto frame #2.


It may be hard to discern the difference in the photo... but thats 4 coats of WR-LPU Whidbey White on the right, and only 2 on the left. I didnt see the point in painting 4 coats in the forward area, as it will be covered by the deck.

The next step will be to either begin assembling the seats, or finish applying the 2nd layer of epoxy to the aft section. Im not sure which Ill do.

Aft section needs a 2nd coat of epoxy before painting.
I also found some Sea Foam Green registration decals online & ordered them. I hope theyll match the bottom paint reasonably well.

These are the decals I ordered. Im looking forward to seeing how they look.


Read More..

The Zip takes one step closer to reality

Last night, I assembled the breasthook and stem assembly for my Glen-L Zip. From my previous experience of having built stems and breasthooks for two other boats, I decided to use a different technique this time.

In the past, I would assemble the two pieces of the breasthook and let the epoxy cure. Then, later on, I would attach the completed breasthook to the stem. This time, I assembled all three pieces together at the same time, using only one batch of epoxy.

The reason for doing it this way was to avoid having to deal with the bead of hardened epoxy that forms along seams where the epoxy is squeezed out from between two parts. I’ve learned that it’s a good idea to scrape away any squeezed-out epoxy before it cures by using a small, flexible putty knife. Still, if a bead of hardened epoxy forms on an inside corner, (such as in the notch of the breasthook), it can be difficult to remove. It can also cause problems when you’re fitting pieces together.

By putting all three pieces together at the same time, this problem is easily avoided. 

I decided to assemble the breasthook and stem with the same batch of SilverTip epoxy that I was using to encapsulate limbers and underside parts on the Utility. Not much epoxy was required for this small bit of encapsulation. I had a small amount of #2 silica ready to add to the remaining epoxy when I was done. The Zip parts were disassembled and staged, ready and waiting for the epoxy.


Limbers & underside parts of the Utility needed to be encapsulated before I attach the bottom planking. I wont be able to reach these places once the planking is on.

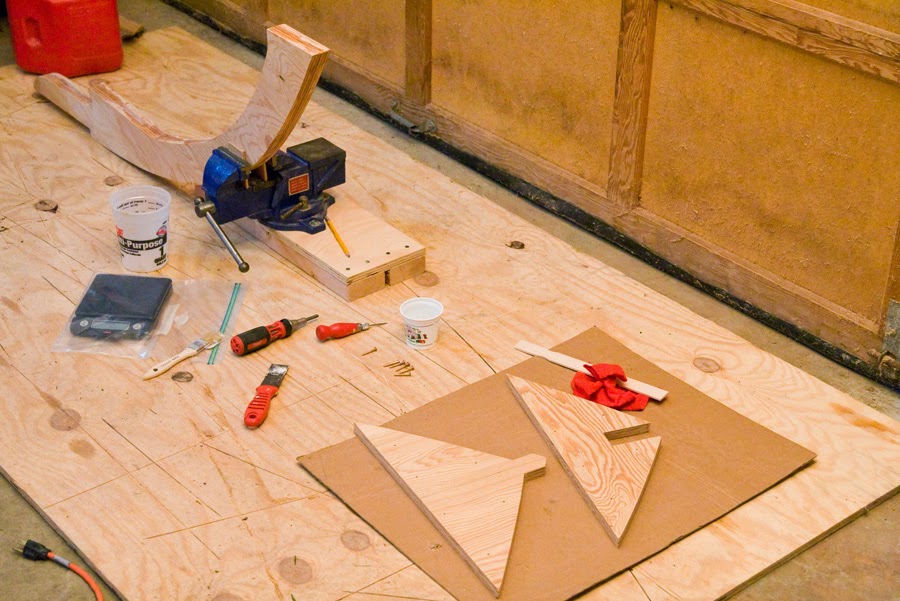
All the Zip parts set to go: stem, mixing cup for epoxy, kitchen scale in a freezer bag, chip brush, screwdriver, putty knife, awl, small container for #2 silica, mixing stick, rag, and both parts of the breasthook.
After encapsulating some small areas on the Utility, I mixed the silica with the remaining epoxy to thicken it for gluing. I spread this mixture on both mating surfaces of the breasthook and on the top of the stem as well. I used an awl to quickly align the holes on the two parts of the breasthook, and screwed them back together. Then, I fitted the breasthook onto the stem, pressed it down firmly, and used two 2.5-pound weights to hold it down into position. Then I scraped away all the epoxy squeeze-out with the putty knife.


The Zips stem
Stem and breasthook assembled, waiting for the epoxy to cure. These parts are all made from 3/4" marine-grade Douglas Fir plywood.


Read More..

G9 minus one Perseverance sees the light of day

The G9 Boatbuilders Gathering is tomorrow. 

Today, I pulled the boat out into the daylight for the first time. It was a great feeling, to stand back and look at it... even though its not quite finished. 

But, shes on the trailer, and ready-to-go.


Trying out the transom saver I bought.
Tonight I attached these spring-loaded fender cleats.


Read More..